Saturday, February 23, 2013

Snacking from the Winter Garden

Sometimes you just want that salty crunchy thing for a snack!

Baked Kale Chips


Some Kale leaves from the garden (note, I should have stripped out the large center stems)

drizzle with olive oil, sprinkle with coarse salt, bake in a preheated 425 degree oven for 5 to 8 minutes.


Salty and crunchy, tasty, just like chips -- but so much better for you!  Eat your greens.

Tuesday, February 19, 2013

Grilled Beets and Mashed Turnips

Last week I paid a visit up to our town's community communal garden where Jef the Farm Dude invited me and my friend to harvest as much red cabbage, turnips and beets as we wanted, as they had tons and he is planning to turn over the bed in the next week or two.  So I have a fridge full now.

Last night I made a Turnip and Pear Mash, which was delicious (chunked turnips and pears, boiled until soft, mashed with butter, salt, pepper and thyme).

Tonight we had Grilled Beets, on greens, drizzled with honey and topped with chopped walnuts and feta cheese.  It was way too cold to grill outside, so I peeled and sliced the beets, brushed them with olive oil and salt and peppered them, and put them under the broiler for about 30 minutes until tender, then set them on fresh greens from the garden, drizzled honey on them and sprinkled them with the walnuts and feta.

Now I need to figure out something to do with the red cabbage.

Wednesday, February 13, 2013

Starting a Garden - The EASY Way

As we start having a few warmer days in February and March, it's tempting to get out there and start gardening!  But if you haven't gardened before and starting from scratch seems a bit overwhelming, or if your main garden is just too wet and mucky to start planting, potting up a few containers that you can place in your sunniest, warmest parts of your yard are a quick and easy way to get some veggies going right away.
asian stir fry mix

If you are in an area where some alternating freezes and thaws may still be likely (like here in Zone 7B southwest Tennessee where we go from highs around 70 for several days, to plunges into the 20's and even snow in February and early March), do not use ceramic containers as the freezing and thawing can cause them to crack.  Stick with plastic or resin composite containers for your early spring February plantings.

Radishes, lettuces, swiss chard, and other leafy greens can all be seeded in pots very easily.  Even peas (sugar snaps and snow peas are especially easy and do well here in the midsouth) can be seeded in containers.  Most veggies, such as these mentioned, only need about 8 inches of soil to grow well, so the containers needn't be especially deep.  Good drainage is important, so be sure your container has good drainage holes.  If the container is large and deep, be sure you put a layer of broken crock (maybe you have assorted broken clay pots scattered around the yard where you forgot to empty them and bring them in for the winter, like I do -- don't throw them away, use the pieces for drainage), packing peanuts, or something to create a layer for water to drain through.  I've used inverted small plastic pots in the bottoms of large pots to create a drainage area.

kale and petunias


Germination of the seeds can be speeded by covering the pots with a blanket or piece of plastic to hold in some warmth, but once these plants have germinated they can handle cold temperatures close to freezing.  If below freezing temps are expected, it's easy to throw something over a group of pots to protect them.

With any luck, you will be pulling up some radishes and harvesting some lettuce leaves in about 30 days, followed by some sugar snap peas and other leafy greens about when you are beginning to get your main garden planted.

discarded recycling bin and window boxes in a cold frame


Since our temperatures here in the midsouth rise so quickly in May, it's important to get an early start on the so-called cool season crops.  If you wait to plant them until late March or April they are likely to turn bitter and bolt before they can even be harvested.

notice the fun painted pots - they're plastic!  This is a community/school garden in Seaside, FL
 Growing organic veggies does not have to be a big production!  You can get started almost any time of year with some containers -- any size, seeds or plants, and some bags of good potting mix.

Monday, February 11, 2013

Gardening WITHOUT a Garden! Growing Sprouts


There is something about harvesting delicious veggies straight from one's own garden and eating it the same day!

But for some, time, space, and even health constraints may make planting and caring for even the smallest garden seem a bit overwhelming.

Growing sprouts can catapult the would be gardener beyond all of those hurtles!  It is the easiest!  Requires only the simplest equipment, found in any household, no soil, no pots, no outdoor space at all!

All you need are some sprouting seeds (buy seeds suitable for sprouting and eating -- conventional seeds for planting may not be the freshest and may even be treated with anti-fungal agents);  a quart size jar of some sort, and something to put over the top of the jar that you can drain water through when you rinse the sprouts (or a cover that can breath, at least, like cheesecloth or a paper towel -- then you will need to drain and rinse the sprouts through a strainer or colander and replace back in the jar, rather than rinse and drain directly in the jar); a counter where you can keep the jar so you see it and won't forget about it; and maybe some indirect sun from a window to green the sprouts up on the last day in the jar.

And talk about economical!  I do believe sprouting must be the most economical form of home gardening there is, with the highest return on one's investment.  I calculated that my investment in a $4.99 8oz packet of "salad mix - alfalfa, radish, and broccoli" sprouting seeds will yield the equivalent of $54.00 worth of sprouts purchased from a grocery in my area.  Add to that the economy of being able to sprout what one needs -- so that hopefully one is not left with half a plastic clamshell of sorry dilapidated uneaten sprouts, it is very economical indeed.


And I can tell you that the quality and flavor, the juiciness and crunch, of sprouts that you have grown yourself, eaten within days of their first sprouting, is far superior to anything you can buy at a store, where it's been shipped and held who knows how long.  And growing it oneself avoids the problems with contamination that commercially grown sprouts have suffered from in the past year or so.

Here is how I grow a quart of sprouts:

Buy seeds (I found mine at Whole Foods).

Measure out 2 teaspoons, and soak them in warm water for a few hours in a quart jar.  I have a set of plastic lids with holes in them that I got way back in the 70's when sprouting was required for any self-respecting reader of Mother Earth News.  These lids fit any wide mouth quart jar.

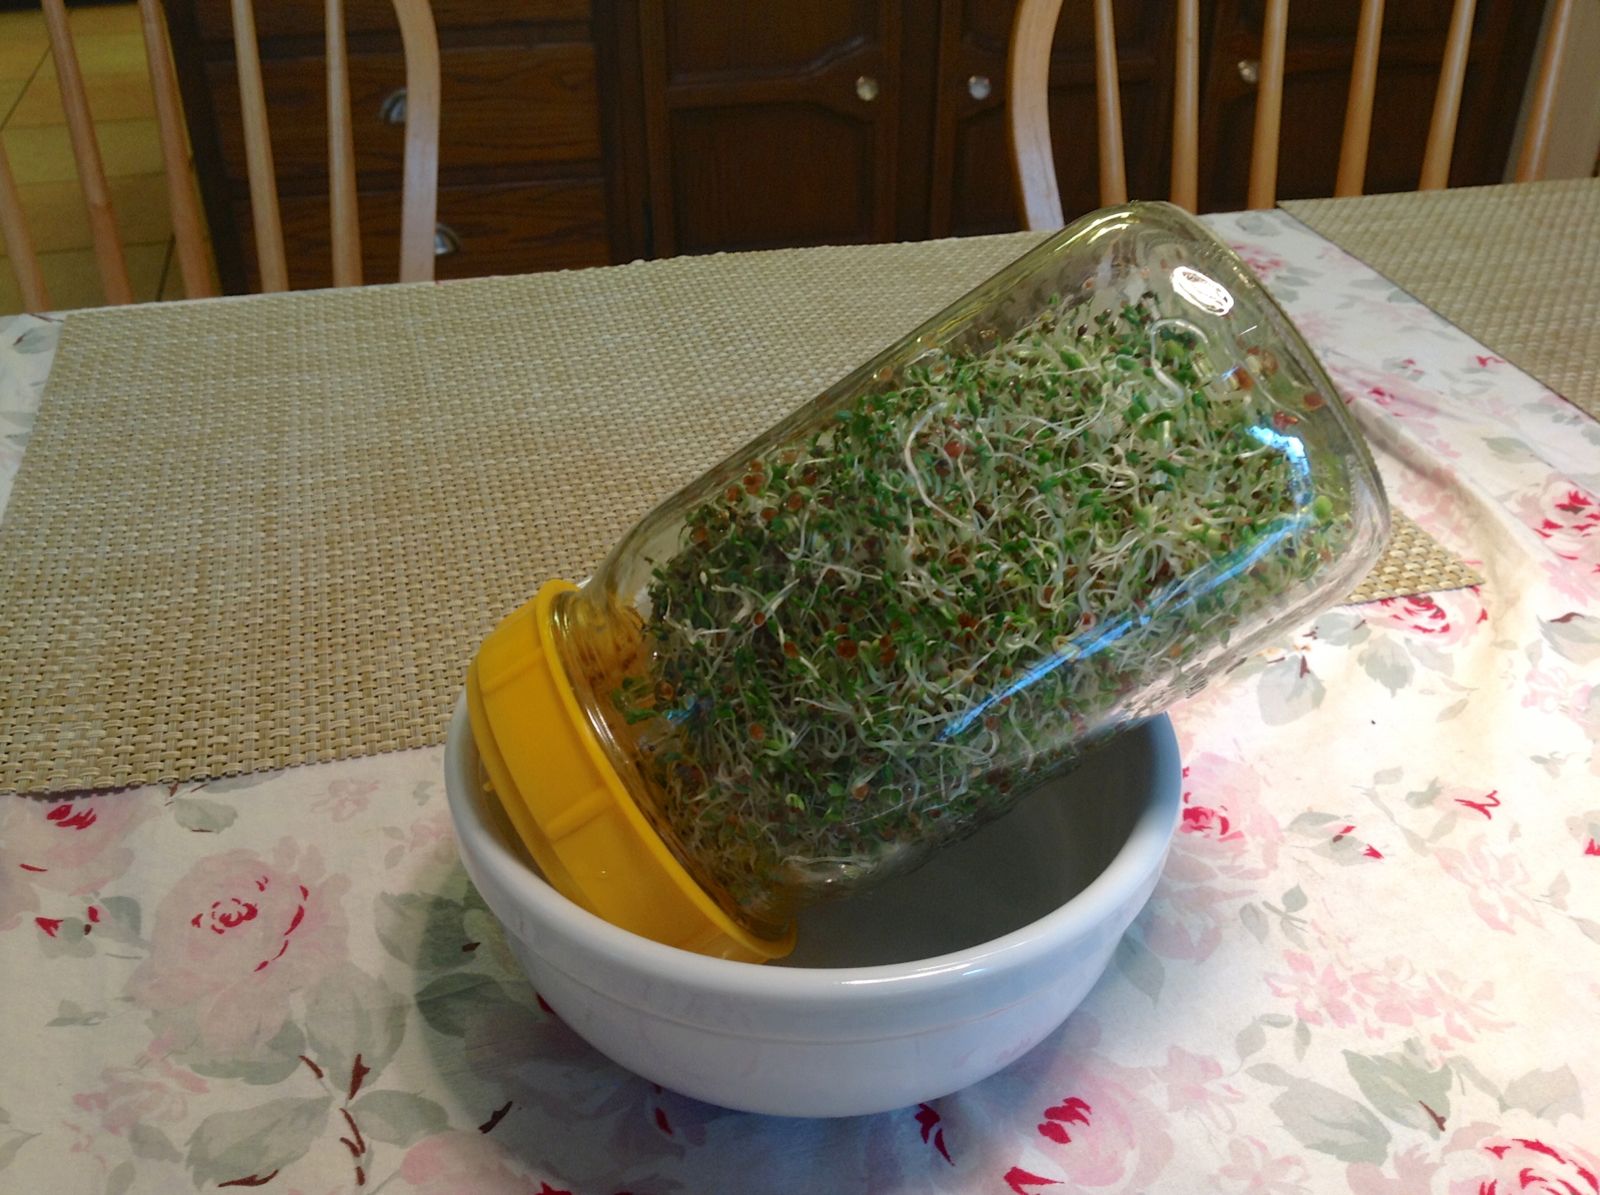
Drain the seeds, and prop the jar so that any excess water can drain out.  You want the seeds to stay moist, but not swimming.


Now, at least 2 times a day (morning and night) -- 3, if you can remember -- pour some fresh water on to the seeds, swish them gently, rinsing them, then drain the water out.


On the third day maybe scooch the jar a little nearer to a window (not in full sun! they would cook then), so the light will green them up a bit.  On the third or fourth day they are ready to eat!  Keep your uneaten sprouts in container in the fridge.  Easy Peasy.  Growing your own food just doesn't get any simpler.


And here's my lunch that very day (bought and soaked the seeds on Sunday, lunch on Wednesday.


As usual, my photos do not do it justice, but here is my sandwich -- whole wheat bread, spread on one side with mayo with a bit of pesto mixed in, and on the other with a bit of leftover chickpea puree from the previous dinner, and for the filling:  bacon, cucumber slices, sun dried tomatoes (much better than so-called "fresh" tomatoes in the winter time!), sliced avocado, and fresh sprouts.


It was so good, I had the same thing for lunch on Thursday!

Linking to The Backyard Farming Connection Blog Hop; Sunny Simple Sunday; Tuesday Garden Party

Saturday, February 9, 2013

Free Garden Dream Guidebook download!


I have been working on a some big projects over the past couple of months!  Since I have been doing some garden coaching for a few people,  I decided to both stretch my computer know-how and develop that business a little more formally, by creating a business website apart from this blog.

To celebrate, I pushed my computer know how against the envelope and created the Garden Dream Guidebook, a downloadable 20 page ebook full of dreamsheets (I won't call them worksheets!) and exercises designed to help a prospective gardener focus in on her dream garden and where and how to begin a garden that is just right for her and her family!  And, I must say, they are pretty to look at and fun to play with -- even if you are an experienced gardener.

I hope you will follow the link here to my new website and fill out the form and request a copy of my Garden Dream Guidebook.  That will also get you on my newsletter list, so you will be the first to know when I have new offerings.  I have plans for a number of short ebooks over the next year, as well as topical garden/urban farming-focused newsletters upon occasion.

(I also made my first video EVER, which can be viewed on the homepage of the website).

Monday, February 4, 2013

Quesadillas with pork and sweet and salty glazed onions

Oh this was yummy!  So yummy I forgot to take a picture of it plated up and I'm trying to refrain from posting pictures of half-eaten food.

Quesadillas made with left-over pork, and my most favorite condiment or "relish" -- sweet and salty glazed onions.

It all began yesterday, when to celebrate Downton Abbey Sunday, I made some barbecue boneless country style ribs, along with roasted carrots and potatoes and an especially nice salad with Asian stir fry greens from my winter garden, topped with clementine orange slices, cucumber slices, and avocado, dressed with a citrus dressing of equal parts olive oil and lime juice, salt, pepper, and minced red onion, sprinkled with lightly toasted sunflower seeds.

A special dinner for a special Sunday.  I heard that there was some sports show on another channel last night, but I don't really know anything about that ;-)

But the dinner I made tonight with the leftover pork -- sublime!  And simple.

1.  cube up leftover pork (theoretically you are supposed to shred these things, but shredding was not happening).

2.  fix up a batch of Sweet and Salty Glazed Onions (3 or 4 onions, sliced, sauteed in olive oil for 10 minutes or so until softened, stir in 1/4 cup of balsamic vinegar and 2 T red wine (I didn't have wine, so I used balsamic vinegar and a good red wine vinegar), 3 T sugar, 1 t salt, 1/2 t freshly ground pepper -- and let all of this cook on low for about 20 or 30 minutes until thick and syrupy.


3.  Make a quesadilla using cheese (provolone or a smoky cheese is especially good), the pork, and the onions.

yum yum.  It was one of those meals you just want to keep eating even after you are full (so best just make one per person so you won't be tempted!)

I've also been busy with other matters.

Found some sprouting seeds at Whole Foods, so I dug out my c. 1976 sprouting lids and did up some seeds.  This is a 3 seed salad mix, with alfalfa, radish, and broccoli seeds.  Should be ready in 4 or 5 days.

super scientific hygienic seed sprouting method


I also replaced some pictures over the couch in our family room with some panels I found on sale at Pier One for less than $10.00 each!

Here is the wall with its tired old pictures and arrangements -- I had bought those pictures at an auction in Hernando, Mississippi over 20 years ago for around $1.50 each and they've been hanging there for 15 years!


Time for a change -- here are the new ones (our family room is rather dark, it only has one window which looks out onto our screened porch).


Much improved.  I think it really freshens up the room.

The picture on the left actually covers up a huge hole in the wall where the stupid non-functioning 1970's coppertone colored intercom/radio went that we ripped out -- which thus dictates all the furniture placement.  I guess one day we will have to deal with the hole in a more reasonable way.

Saturday, February 2, 2013

Spring, where are you?

Well, I guess some parts of the country would consider our 40-50 degree highs spring like, but I DON'T!  I'm done with it!  I want some real Spring!

I went out searching in the yard.  Harvested a big bunch of lettuce that had been covered against lows as low as 22 degrees the other night.  So far I haven't had to buy any lettuce this winter.

Anyhoo -- I found these harkenings of springtide:


The hellebores (lenten roses) are blooming.  Of course, no surprise that -- they're supposed to bloom in January!


But this . . . the first daffodil of the season!  Used to, I could count on the first daffodil to bloom about the second week of February.  But this year, and last year also -- blooming on January 30.  If we have several sunny days (we've had over 9 inches of rain in January!), then I'll be bringing bunches into the house by the middle of this coming week.

I have not been successful in taking good pictures of the birds at my feeders outside the kitchen window -- but every day we are seeing flocks of goldfinches, purple finches, some red-breasted nuthatches, tufted titmice, chickadees, downy woodpeckers, cardinals, and two bluebird pairs!  And the little Carolina wrens are flitting around beginning to build nests in whatever little corners they can find.