Wednesday, February 29, 2012

Home-made Hamburger Buns


baked hamburger buns
Home-made hamburger buns are easy to make, and so much better (and cheaper!) than store-bought.  They are especially easy to make if you have a heavy duty mixer, like a Bosch or KitchenAid that will let you mix and knead a large quantity of dough at once.  I make enough dough for 32 hamburger buns, and store the buns in the freezer.  I use the same dough recipe that I use for rolls and bread.  It makes about 4 "batches", each batch can be made up into 8 hamburger or hotdog buns, or 12 rolls, or one loaf of bread (so 32 buns, 48 rolls, 4 loaves -- or any combo of them).


I am fortunate to have a wheat mill, so I order wheat berries in 50 lb bags and keep them in two 25 lb containers, like the one above.


I grind about 9 cups of wheat at a time.  Into the mill, which then shoots the ground flour into the flour canister.


The mill has several settings to determine coarseness or fineness of the grind, and I can grind corn, beans, or other grains.  You see the flour above.  I pretty much just use winter white wheat berries, which grinds into whole wheat of course (since it is the whole berry), but it bakes up more lightly and has a milder flavor than red wheat -- it is more like white flour, but has all the nutrition of whole wheat.  So all my baking uses 100% winter white wheat berries and I don't have to mix in "white" flour to get a good rise.

Here we go with the recipe (adapted from a recipe in the book "Hearth and Home" by Karey Swan.  The picture above is of mixing up 3 cups of warm water, 2 Tablespoons yeast, 1/3 cup oil, 1/3 cup honey, 3 cups of whole wheat flour and 1/4 cup of gluten (the gluten is optional).  Then you let it sponge (sit) for 10 minutes for the yeast to activate.
sponge with yeast bubbles after sitting


Add 1 1/2 teaspoon salt, 3 room temperature eggs, and enough flour to clean the bowl.  For me, here in the humid southeast this can be anywhere from 3 1/2 cups to 4 1/2 cups of flour.  After 3 1/2 cups I add additional flour by the 1/4 cup.


This what it looks like when it "cleans the bowl".


See how clean the bowl is when I dump out the dough?


And there is the big glob of dough ready for a few turns by hand just to smooth it up.  Rather than using additional flour on the board or on my hands, I use a bit of oil on the board and on my hands.  This keeps you from kneading in too much flour and keeps your dough lighter.


This is what it looks like after a very brief kneading by hand -- just a few turns.  Now it's ready to divide into 4 parts.  Each part will make 6-8 hamburger buns (or 12 rolls or a loaf, or a pizza crust or two, or some cinnamon rolls, so you can make something for supper, breakfast, lunch all in one baking session).
shaping into buns


Shaped hamburger buns ready to go into the 375 degree oven, for about 10-15 minutes.


And here are the finished hamburger buns, ready to cool and use or go into the freezer.  The whole process takes only about an hour when you use instant yeast and you sponge the dough, as the dough does not have to sit and rise.

Sunday, February 26, 2012

Homemade Laundry Detergent


I've been a gardener, and canner and freezer of produce for for 32 years, a parent for 26 years, user of cloth only napkins for 20 years, a homeschooling parent for 18 years, a grinder of wheat for 14 years, and a backyard urban chicken-keeper for 6 years (not sure whether I've always just been ahead of the curve, or just a "come up from behind" hippie).  But, even though I had read recipes for homemade laundry detergent -- I just never did that.  Grating, and boiling, and dealing with gloop -- um, no.  Too much effort.  But Lady of the Woods wrote of a recipe for a powdered detergent -- grate the soap, mix with the other ingredients, put in a jar, print out a cute label and you're done.  The cost works out to about half the cost of store-bought laundry detergent (assuming you don't have to buy a jar) and the ingredients are readily available at Kroger.


So, I mixed up a batch, printed out a label, and we used the detergent to wash towels and napkins.  Looks like success!  No weirdness or residue, and appears to have cleaned fine.  I will say that grating that fels naphtha soap was NOT as easy as some have made it sound -- it took a while and a good bit of effort.  Maybe I need a new grater.  Or maybe next time I'll just whiz it in the food processor (it IS soap, after all -- so I think that would be fine.


Here's the recipe:  1 bar of fels naphtha or zote soap, grated (I have read you can use any soap -- ivory, castile soap, etc. The fels naphtha was $1.30 at Kroger, in the laundry section), 1 cup of Borax (remember Death Valley Days?  Twenty Mule Team?  That's the stuff), and 1 cup of Super Washing Soda.  You can add a few drops of an essential oil for scent if you want.  Mix it together, store in a container.  Use 2 tablespoons for a load.


Of course, don't forget to go to The Graphics Fairy and print out a nice label.  I just discovered the "stickies" app on my Mac Pro -- I think I need to make a sticky on my computer for "projects", like "fix up the laundry closet" (we have a laundry closet upstairs, rather than a laundry room -- and it is s-c-a-r-y nasty), so as to better show off my lovely jar with vintage label.

linking to Brag MondayCountry Garden Showcase

Friday, February 24, 2012

Record Warm Temperature


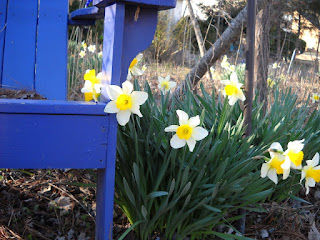
Yesterday we had a record high for the day, 79 degrees!  Our normal high is 54 this time of year.  It was sunny and beautiful.  We have had a lot of rain, making the ground too mucky to do much gardening.  However, my brother-in-law sent us home from Maryville last weekend with a huge cat litter bucket of daffodils he dug from an area of their yard where he wants to install a garden railroad.  He keeps digging out daffodils and they breath, "At last, some room to spread out!"  So he has pulled out buckets and buckets.  With the warm weather, I managed to set out all of the daffodils.  I already have a good many naturalized throughout our yard (all in full bloom right now), but I can always manage to find room for more!


They all look pretty much like the picture below -- kind of limp.  But by next spring they should be fine.


While I was scouting out spots for the new daffodils, I found this little beauty:


It's growing right next to the driveway.  At first I thought it must be a crocus.  I have no idea where it came from and it seems to have popped up from nowhere.  Then I looked closer.


It looks to be some kind of miniature iris.  This is way too early for any irises to be blooming, though.


I think it is just amazing.

linking to Show off Your Cottage

Monday, February 20, 2012

Salad Table progess report


I shared how my husband made me a salad table for Christmas here, and how I planted my seeds a few weeks ago.  Last week I had to cover it not only with the garden quilt (which protects down to 25 degrees), but also with an old shower liner when the weatherman predicted our coldest nights so far this winter -- a low of around 20 degrees.  After several cold days and below freezing nights, I uncovered the Salad Table to check on the germination of the seeds.  I have been pleased to find good germination, with the baby seedlings surviving the freeze!  So far, the Salad Table has been a success.


With any luck, I may be making my first harvest of the microgreens in 2 to 3 weeks, and some lettuce and stir fry greens by the end of March.


This past weekend we traveled across the state to Maryville, Tennessee so our 18 yr old could interview for some additional scholarship money at the college there, where she hopes to enroll next fall.  Coming back yesterday we got caught in a snow storm, with near white-out conditions, cars sliding off the interstate on the icy road -- it was quite a hair-raising drive on the Cumberland Plateau heading west.  Too scary to even take pictures!  A reminder, along with our cold snap last week, that it's still winter.  But from Nashville to Memphis it was clear sunshine, and a balmy 50-something degrees.

Tuesday, February 14, 2012

Easy Meal

pizza pasta

Budget (stretched) and income (flat) being what they are, along with helping one daughter with college over the past 5 years, and looking towards having daughter #3 begin college in the fall, and daughter #4 following along in 4 years, we almost never go out to eat.  Maybe once a month, but sometimes we go months at a time without eating at a restaurant.  I don't like to spend my "out to eat" money on fast food, so I have a repertoire of easy, no-think, practically-cook-themselves dinners that I rely on for those "I don't know what to fix" or "I don't really feel like fixing anything" nights.  These dinners are also easily re-heated.  With 2 teens, and a husband whose job requires attendance at city government meetings held at night anywhere from 1 to 3 nights a week (like tonight), we seldom have everyone eating dinner at the same time anymore, so whatever I make needs to be able to hold and be reheated.

Tonight I made Pizza Pasta.  I usually make our own pizza, and inevitably I prep more toppings than we need for the pizzas.  Sliced onions and peppers go a l-o-n-g way on a pizza, as do olives, sun dried tomatoes, sausage, or whatever.  This recipe makes use of those leftover toppings (or one can make it instead of pizza if one doesn't want to mess with a pizza crust.

In a large bowl put 2 teaspoons of minced garlic, along with 2 tablespoons of olive oil, 1 1/2 t of Italian seasonings, 1/2 t of balsamic vinegar, some chopped tomatoes or cut up dried tomatoes that have been soaked and drained, and any other prepared (cooked) pizza toppings you want -- either heated or room temp, you don't want them ice cold (onions, peppers, sausage, pepperoni, olives, etc) -- and mix it all up.  Meanwhile cook a pound of short pasta, drain and add the hot pasta to the bowl and mix it all up together.  Mix in 3/4 cup of parmesan cheese and 1/2 cup (or however much to your liking) of mozzarella cheese (the heat of the pasta will melt all of this).  Add pepper if needed.  After I put it in a serving bowl I topped it with some more mozzarella.  Seems like if one had particular eaters, one could have the pizza toppings as add-ins for individual servings rather than all mixed in.

Linking to Country Homemaker Blog Hop

Monday, February 13, 2012

Valentine Vignette


Unlike Christmas, my Valentine's Day decor is fairly minimal, mostly accumulated or crafted when my daughters were younger and enjoyed seeing all holidays decorated and celebrated with exuberance, and often initiated the crafting and decorating themselves.  Valentine's Day always was a welcome diversion to the dreary homeschool routine of the long haul from January to when spring weather would settle more reliably.  Our homeschool group would make and decorate candles for Candlemas/Brigid on February 1, have a Valentine exchange and skate party on February 14, and often do something for Chinese New Year and Mardi Gras, making the time from mid January to mid March more eventful.


However, this heart on my front door is a new addition.  I got it for just a couple of dollars at Hobby Lobby, in the Christmas clearance.  It is metal and was painted a red, with black shadowing on the edges.  I liked it as it was, but it simply did not show up very well when viewed from the street and sidewalk.  I painted it with some craft paint I had on hand, and I think contrasts very nicely with the blue door and shows up better behind the screen door.  After Valentine's I may hang it up somewhere on the brick outside.


In my kitchen, some hearts hang over the table from the light.


And a wooden heart garland frames the eating area.  The garland was another Christmas clearance item from years ago.


In the dining room, I have a few candles, my little tea tray, and a Valentine's Box that we crafted.  The box holds old Valentines from the various exchanges and skate parties we did when the girls were younger.

There are several small clothespins hot glued on to the back, so that some Valentines can be displayed.  The feet of the box are tiny painted clay pots, with felt on the bottom so they don't scratch the furniture.

A bit of Valentines paper craft with the tea items.

Leaning against the candles, a Valentine's pin made by one of the girls from hand made paper she made at a Botanic Garden homeschool class one year.  And a simple mouse Valentine, left over from ones the girls made several years ago to exchange.  Cut hearts from red construction paper or card stock (by drawing half a heart on the folded paper), draw a nose and whiskers, eyes, and ears on the outside of each half of the folded heart, tape or glue a finger crocheted length of thin yarn for a tail, write a sentiment on the inside.

Friday, February 10, 2012

Goodbye Blossoms, it was nice to know you


The tulip magnolia outside my kitchen window.  The unseasonably warm weather of the past couple of weeks has prompted the tree to break bud.  See that pink?  The blossom to come -- only it won't.  Not this year.  Tonight the temperature is supposed to drop down to 22 degrees, tomorrow night down to 15 or even lower.  When the buds are that far along, they will freeze, turn black and fall off.


The hellebores (lenten roses) are in full bloom.  I think they may be fine -- I know they grow these up north with no problem.  We have more of a problem keeping them on life support through our hot humid, yet drought-like, summers.


Some of the daffodils in my front yard, along the front walk.  I've picked some to bring in.  They may be ok through the cold.  They are tough troopers.  They'll lie down through the freeze, but perhaps will perk back up once it warms up more next week.


More daffodils along my side border (near the tulip magnolia).  they are between the driveway and the house, so perhaps the residual heat of brick and asphalt may help them.  At least a cold snap in February will not last as long as one in January -- just a few days, not a week or more.  And our ground temperature is probably relatively warm, since we have not had an sustained sub-freezing cold yet this winter.

But, farewell magnolia blossoms.  Better luck next year.

Tuesday, February 7, 2012

Eggs Again!

Pomegranite

I am so happy my girls have started laying again!  I have had a little flock of 4-6 ameracaunas for the past 6 years.  I only have 3 left now, 2 of whom are six years old and one being two years old.  Egg laying is somewhat seasonal, being related to hours of daylight.  Although my chickens used to lay year round when they were younger, the number of eggs would decrease during the dark of the winter.  As the chickens have aged, their laying has decreased even during the summer (when they were young I would get 30+ eggs a week from 4 hens, this past summer I got around 15 a week at peak laying from the 4 old hens).

Gwynno and Esther

This past fall they started molting in November and quit laying altogether, but two weeks ago they started back up -- not many, but it's nice to have my own fresh eggs again.


You can't tell in the photo very well, but my eggs are blue and green.  One of our projects this spring will be to rebuild the coop and fence off an area for the chickens so they don't rampage over the whole back yard.  And hopefully I'll be able to find a couple of pullets to add to the flock.  I really don't want to start with chicks again, as they are a bit of work and we go on vacation right in the middle of prime chick time.

Linking to Masterpiece MondayShow off Your Cottage MondayHome and Garden Thursday

Sunday, February 5, 2012

Salad Table


My husband built me a salad table for Christmas.  It is essentially a shallow planting box (4 inch depth) on legs that could theoretically be moved to different areas of the yard -- a warm sunny location in the winter and early spring, a shady location in the heat of the summer.  It is specifically for growing shallow rooted salad greens, like lettuce, radishes, pak choi, etc., giving them the optimal conditions they need and letting them run their course through the spring and summer, while freeing up space in the garden proper for the summer vegetables, like tomatoes, peppers, eggplants, and cukes.


I purchased a "garden quilt" (row cover fabric) from Gardener's Supply that is supposed to protect down to 25 degrees.  So with this in mind, I went on and planted the salad table a good 4 or 5 weeks earlier than I would dream of planting in the open garden.  Although we have very pleasant, moderate temperatures in February and March, our last frost date isn't until April 15, and we actually get our biggest snow (ok, don't laugh -- I'm talking 1 to 6 inches, but still . . .) and ice storms in February and even March.  Even without snow or ice, our temps can be in the 70's one day and plunge down below freezing the next.  So it takes a while for the soil in the garden proper to warm sufficiently to germinate and sustain seedlings.


We placed the salad table on the south side of the house, by our big kitchen window.  I have the seeds planted and tucked in under their blankie (which, garden cat Ophelia thinks makes a nice little bed for her, too :-( -- I may have to rig up some anti-kitty pokey things).  It gives her a nice view of the bird feeders, as well as comings and goings in the kitchen and on the street.  Our other cat, Belle, prefers the view from the window sill inside.


I believe the garden quilt can serve as a shade cloth also when things really heat up.  I am finding that shade cloth is an important key to growing salad greens through the summer here in the Memphis area.


Linking to Show off Your Cottage MondayMasterpiece MondayHome and Garden ThursdayFarmgirl Friday ; Homestead Barn Hop