First, a picture of my daughter and her friend ready to head to an Anime convention held at the Memphis Botanic Garden this weekend. Cree is a "My Little Pony", and her friend has been "consumed by darkness". I'm sure you can guess which is which in the picture. Cree and her friends love to CosPlay (dress up in costume) and the environment at the Botanic Garden was a very nice, safe venue.
Now, on to paper towels.
Oh, the dilemma of Paper Towels! So handy and convenient, yet wasteful, kind of expensive, and guilt inducing (at least for those of us that worry about waste and recycling and frugality and such -- I have to add that I know many many worthy, considerate, kind people who never give paper towels a single thought).
Years ago when I had cloth diapered babies, and ultimately 4 children, we eliminated paper napkins from our house and began exclusively using cloth napkins. Since we seemed to be doing laundry all of the time, adding cloth napkins to the mix did not seem burdensome at all -- and so we have continued over the years. The napkins live in a drawer in the kitchen peninsula between the cooking area and the eating area, facing the table -- so they are very convenient to get to when we need them.
But paper towels remained in our lives. Until recently. I figured out a solution that works for our kitchen layout and keeps things handy and convenient.
1. We do keep one roll of paper towels, because sometimes things come up that you just want to use a paper towel for -- you don't want to put anything in the wash -- you just want it GONE. I won't elaborate on what those occasions are for me, but I'm sure you might have your own list.
We keep the roll in the utility closet in the kitchen, so it's there when we need it, but not so convenient that we automatically grab it for spills and clean up, microwaving, crumb catching or whatever.
2. I purchased a pack of 12 smallish white washcloths at Target when they were on sale with all the dorm stuff back in the fall ($4.99) and started out with that, and later augmented that with a purchase of 12 (I think -- or maybe it was 24) very ample white washcloths from Costco for about $16.00. White, so they can easily be bleached if we want.
3. Half of these I keep in a plastic bin under the sink on the "cooking" side of the peninsula. The other half I keep rolled nicely in a wicker basket on TOP of the peninsula, accessible from both sides of the kitchen where we used to keep the paper towels. This means we can easily get one of these cloths when we need one from both sides of the kitchen, and the basket keeps them looking nice.
4. We have a bag hanging inside the utility closet where we throw any soiled cloth napkins and washcloths, making it easy to get them out of the way and to tote to our laundry area (which is upstairs).
Since we adopted this approach, one paper towel roll has lasted us for months!

Now, I must be honest -- if I had small children, and most especially boys -- I am pretty sure I would be using paper towels still!
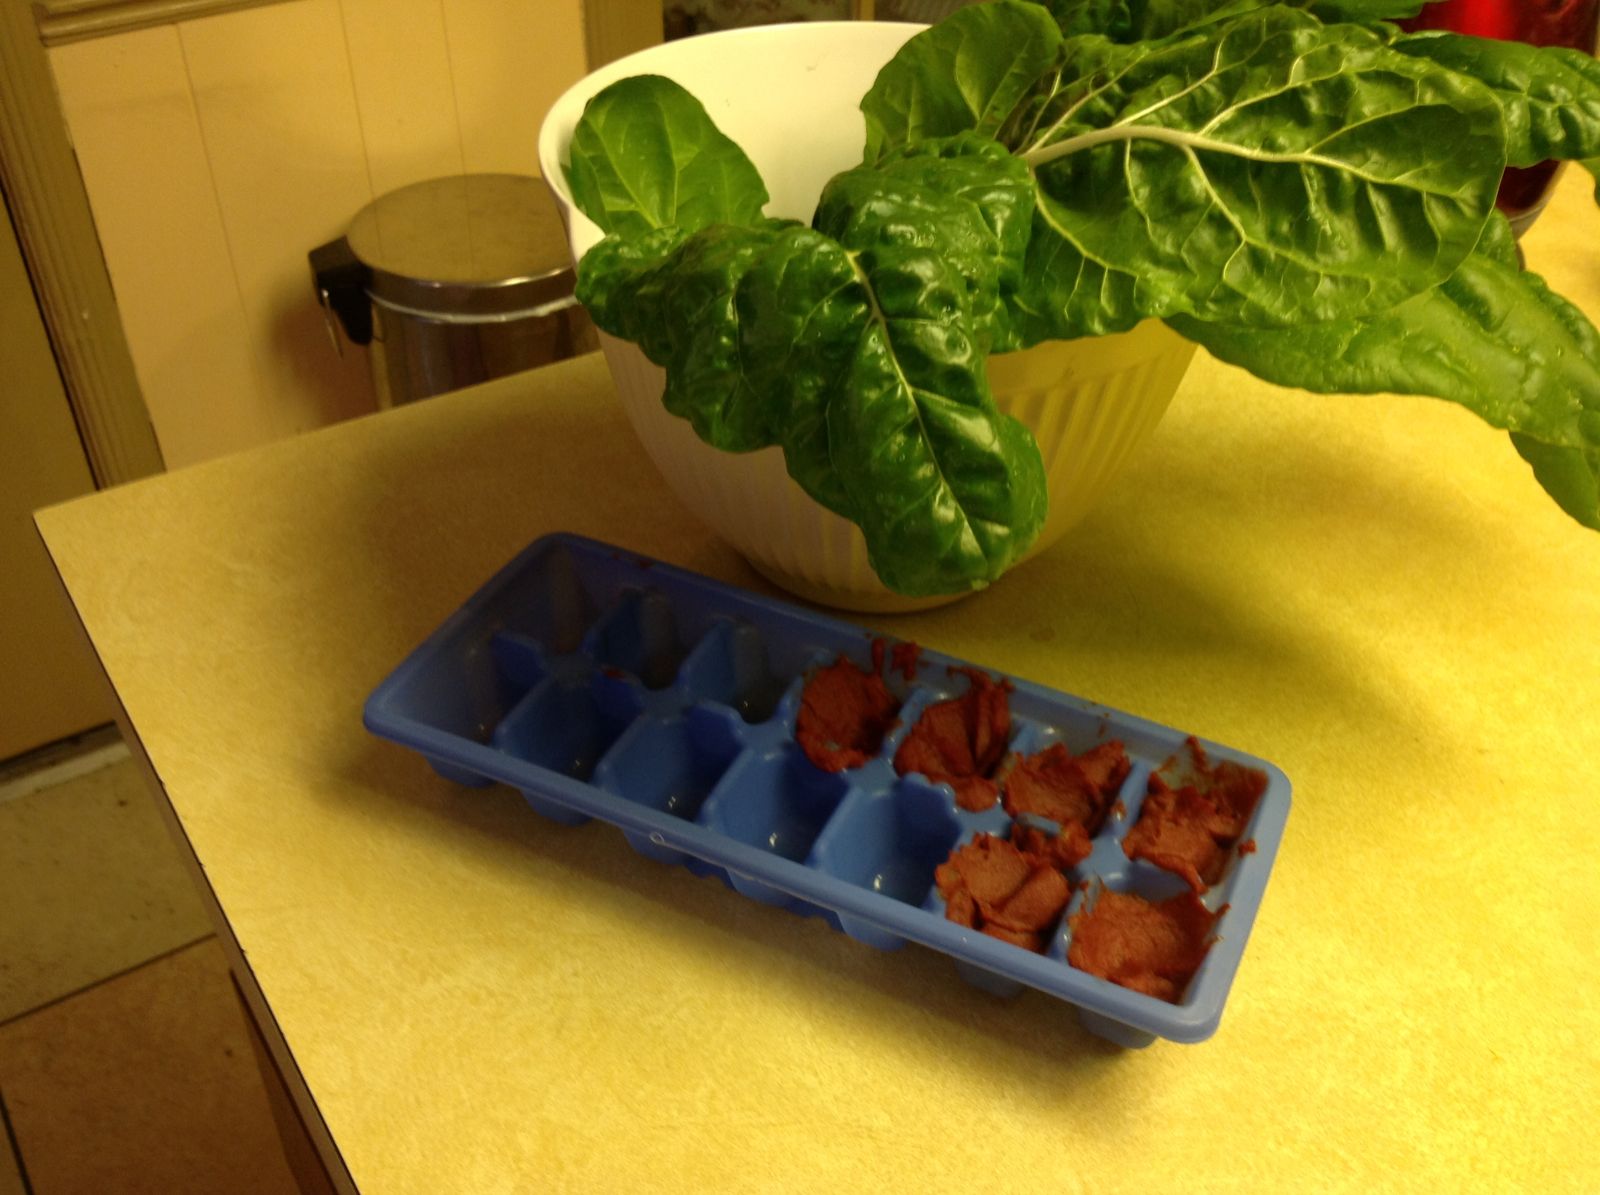
Bonus Frugal Tip: When I open a can of tomato paste, I use what the recipe calls for (often just one or two tablespoons), and then put the remainder in an ice cube tray and put it in the freezer. After it's frozen, I pop the tomato paste cubes into a freezer bag and keep handy in the freezer part of the fridge. One can lasts a good long while that way, before I have to purchase another one.
Sharing with
Sunny Simple Sunday;
Farmgirl Friday Blog Hop